The easiest way to make and print your own CD Covers
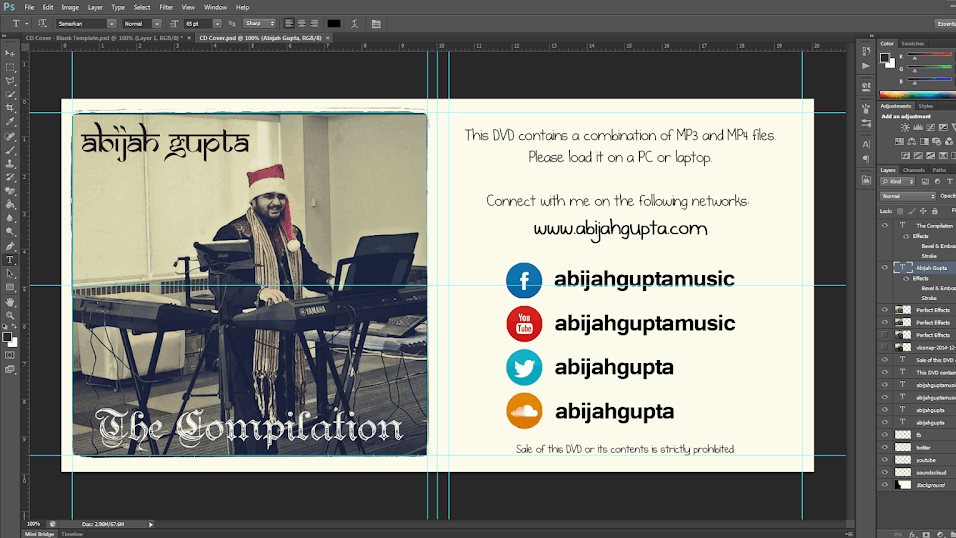
Download the Adobe Photoshop .PSD template here...

- You will notice there are two black boxes on either side: The left side will be where the image goes while the right side will have textual descriptions and links.
- The blue guidelines will ensure you don't enter the bleed zones (areas that are folded or cut)
- Save the file as PNG.
- Make sure you've turned off and/or deleted the guide layers before you save!
Important Microsoft Word tweaks
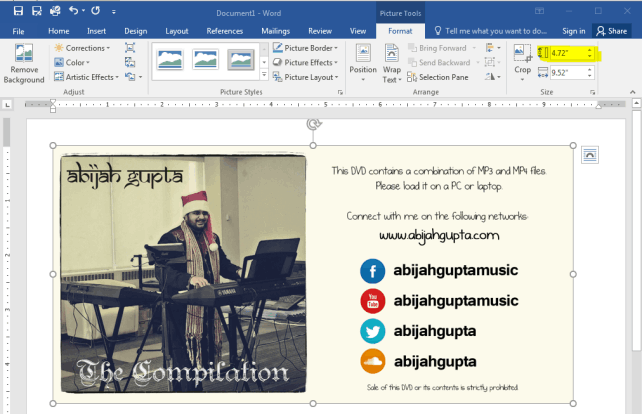
 Next, open up a new Word document. Change the layout to landscape and set the margins as narrow. This will give you enough space to position and size your cover.
Important: When you drop the image in the document, it will stretch to fit the width. If you print it as it is, it will be oversized. Here's what you do: Click on the image and then go to Picture Tools > Format and set the height to 4.72". The width should auto-adjust to 9.52"
Now you are ready to print the file as it is. Cut across the borders, and it will be a snug fit in the CD Cover.
Key Takeaways
- For booklets, you would repeat the same process depending on the total number of pages required and then manually staple them together. I've found printshops to be more reliable and efficient when dealing with booklets (depending on the number of prints required, I can get deals on the $, but if you're just doing a few it may not be worth the costs!)
- While there are many other options available for creating CD Covers, I've found this method to be easy, quick and economical. Send me a message if you've discovered something even better!


